
brother sewing machine xl2600i manual
Get the Brother XL2600I sewing machine manual for easy operation. Download now and explore features, troubleshooting, and maintenance tips.
Welcome to the Brother XL2600i sewing machine manual! This comprehensive guide is designed to help you maximize your machine’s potential. From initial setup to advanced features, troubleshooting, and maintenance, this guide will assist you in achieving professional results, fostering creativity, and ensuring seamless sewing experiences. Happy sewing!
Features of the Brother XL2600i
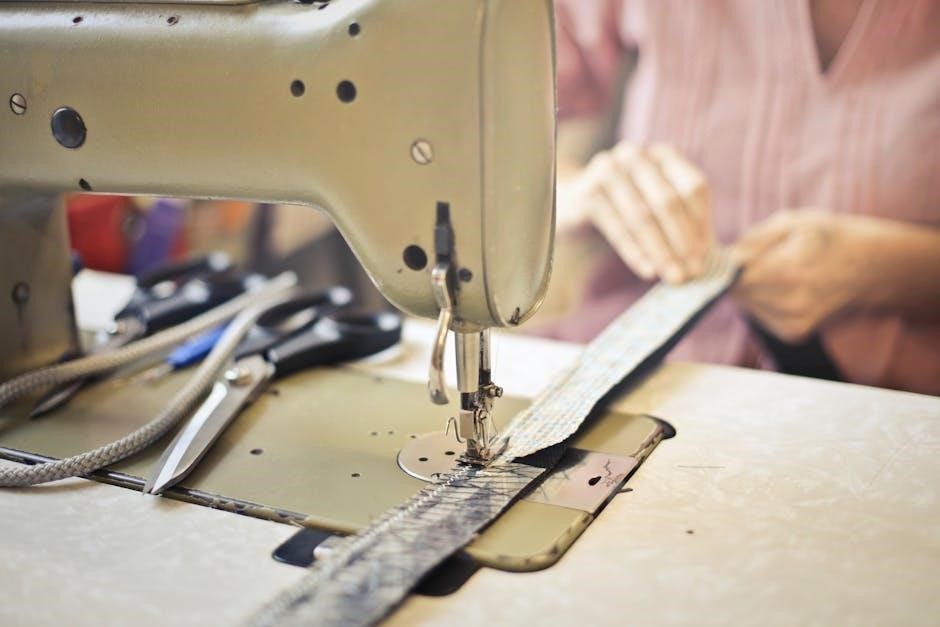
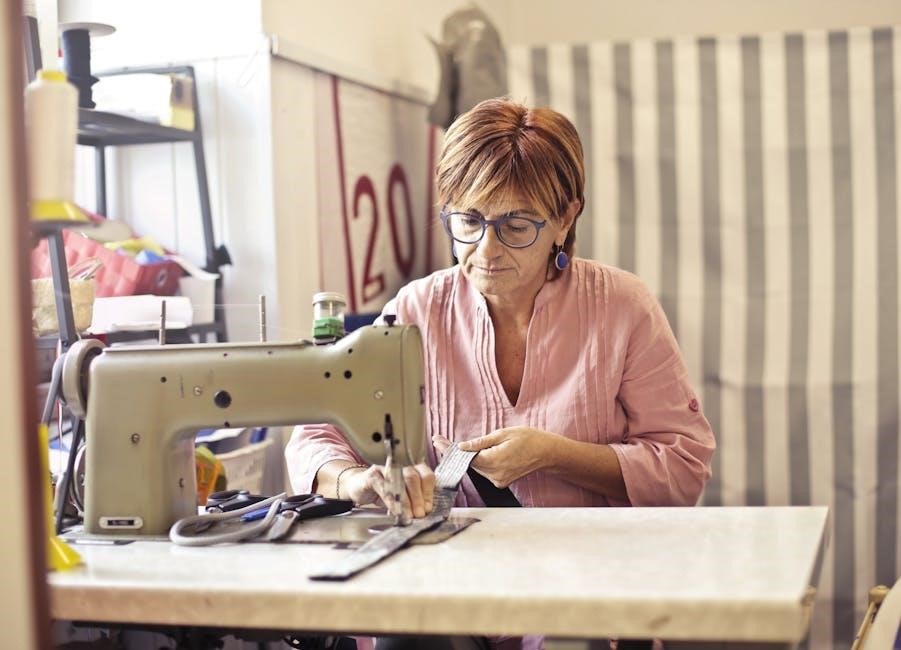
The Brother XL2600i sewing machine offers versatility and ease of use, featuring 103 built-in stitches, automatic needle threading, and a free-arm design. With 7 included presser feet, it caters to various sewing projects, from quilting to embroidery, making it ideal for both beginners and experienced sewists alike.
Key Features
The Brother XL2600i sewing machine is equipped with a range of features designed to enhance your sewing experience. One of its standout attributes is the automatic needle threader, which simplifies the threading process and saves time. The machine also boasts a free-arm design, allowing for easy maneuverability when working on cuffs, sleeves, and other hard-to-reach areas. Additionally, the XL2600i features a built-in sewing light, providing clear illumination of your work area, even in low-light conditions.
Another notable feature is the adjustable stitch length and width, giving you control over the appearance of your stitches. The machine also includes a reverse sewing function, which is essential for reinforcing seams and preventing fraying. Furthermore, the XL2600i comes with 7 interchangeable presser feet, catering to various sewing tasks such as zigzag, zipper, buttonhole, and blind hem applications. These accessories are stored conveniently in a built-in compartment, keeping them organized and within reach.
Overall, the Brother XL2600i is a user-friendly machine that combines practicality with versatility, making it suitable for both beginners and experienced sewists. Its robust feature set ensures that you can tackle a wide range of sewing projects with confidence and precision.
Stitch Options
The Brother XL2600i sewing machine offers a variety of built-in stitch options to cater to different sewing needs. With 25 unique stitches, including straight stitches, zigzag stitches, and stretch stitches, this machine provides versatility for crafting, quilting, and everyday sewing projects. The stitches are divided into categories such as basic utility stitches, decorative stitches, and stretch stitches, ensuring you have the right stitch for every fabric type and sewing task.
One of the standout features is the automatic one-step buttonhole, which allows you to create perfectly sized buttonholes with minimal effort. Additionally, the machine includes a range of decorative stitches that can be used to add embellishments to your projects, such as floral patterns and geometric designs. The stretch stitches are particularly useful for sewing knits and elastic fabrics, ensuring a professional finish.
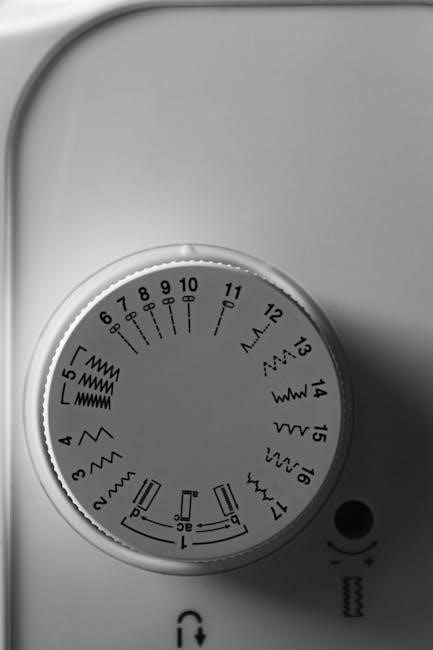
The stitch options are easily accessible via a dial on the machine’s front panel, making it simple to select the desired stitch. A stitch chart is also conveniently located on the machine’s lid, providing a quick reference guide to all available stitches. This feature-rich stitch selection ensures that the Brother XL2600i is capable of handling a wide range of sewing tasks with ease and precision.
Whether you’re working on a simple repair or creating a complex garment, the Brother XL2600i’s stitch options provide the flexibility and creativity you need to achieve professional-looking results. The ability to adjust stitch length and width further enhances your control over the sewing process, allowing for customization to suit your specific needs.
Overall, the diverse stitch options on the Brother XL2600i make it an excellent choice for sewists of all skill levels, from beginners to experienced crafters. The machine’s stitch variety ensures that you can tackle a wide array of projects with confidence and creativity.
Built-in Functions
The Brother XL2600i sewing machine is equipped with several built-in functions designed to enhance your sewing experience. One of the most convenient features is the automatic needle threader, which saves time and reduces eye strain by threading the needle for you. Additionally, the machine includes a built-in sewing light that illuminates your work area, ensuring visibility even when sewing intricate details or in low-light conditions.
Another notable function is the automatic stitch length and width adjustment, which allows you to customize your stitches without manual calculations. The machine also features a free-arm design, making it easier to sew cuffs, sleeves, and other hard-to-reach areas. Furthermore, the reverse stitching function enables you to reinforce seams by sewing backward with the touch of a button.
The Brother XL2600i also includes a built-in carry handle, adding portability and convenience for sewists on the go. These built-in functions collectively make the machine user-friendly and efficient, catering to both beginners and experienced sewists. By incorporating these features, the Brother XL2600i streamlines the sewing process, allowing you to focus on creativity and precision in your projects.

Setting Up Your Brother XL2600i
Setting up your Brother XL2600i is straightforward. Begin by carefully unboxing and inspecting the machine. Ensure all accessories are included and accounted for. Plug in the machine and familiarize yourself with the control panel. Thread the machine and install the bobbin as instructed. Adjust the tension if necessary and test sew on scrap fabric before starting your project. Always refer to the manual for specific guidance to ensure proper setup and operation.
Unboxing and Initial Setup
Unboxing your Brother XL2600i is an exciting first step. Carefully open the box and ensure all components are included, such as the sewing machine, sewing feet, bobbin, needles, and instruction manual. Place the machine on a stable, flat surface and plug it into a nearby power outlet. Before turning it on, inspect the machine for any visible damage or debris from shipping. Familiarize yourself with the control panel, noting the stitch selector dial, reverse stitch button, and other essential features. Take a moment to read the manual, as it provides detailed guidance for setup and operation. Once everything is ready, press the power button to test the machine. If it operates smoothly, you’re ready to proceed. If not, double-check the power connection or consult the troubleshooting section. Proper unboxing and initial setup ensure a seamless sewing experience. Always handle the machine with care to prevent damage.
Threading the Machine
Threading the Brother XL2600i is a straightforward process that ensures smooth stitching. Begin by turning off the machine and raising the take-up lever to its highest position. Locate the spool pin and gently pull the thread through the machine’s upper thread guides, following the arrows printed on the machine. Insert the thread into the tension discs, then guide it through the take-up lever and finally through the needle. Leave a small tail of thread (about 4-6 inches) after threading the needle. Always use high-quality thread suitable for your fabric type. For easier threading, use the built-in automatic needle threader by pulling the lever located near the needle. Avoid pulling the thread too tightly, as this can cause tension issues. If the thread does not flow smoothly, check for tangles or twists in the thread. Proper threading is essential for consistent stitching and prevents common issues like uneven seams or thread breakage. If you’re using a different thread weight or type, refer to the manual for specific guidelines. Always rethread the machine if it has been idle for an extended period. For best results, use the same thread in the bobbin to maintain balanced tension. Regularly inspect the thread for wear or damage before sewing.
Winding and Installing the Bobbin
Properly winding and installing the bobbin is crucial for smooth stitching on the Brother XL2600i. Start by preparing your bobbin and thread. Place the bobbin on the bobbin winder, ensuring it clicks into position. Pass the thread through the small hole in the bobbin and wind it around the winder 3-4 times to secure it. Engage the bobbin winder by sliding it to the right and start winding until the bobbin is evenly filled. Once full, cut the thread and remove the bobbin from the winder.
To install the bobbin, lift the sewing machine’s needle to its highest position and open the bobbin case cover. Pull out the old bobbin and insert the newly wound one, ensuring it sits correctly in the case. Close the cover and gently tug on the thread to ensure it is seated properly. If the bobbin does not spin freely, it may not be installed correctly. Always use the same type of thread for the bobbin as you use for the top thread to maintain balanced tension. For heavy fabrics, you may need to use a larger bobbin or adjust the winding tension. Regularly check the bobbin for tangles or twists before sewing. Properly wound and installed bobbins prevent issues like uneven stitching or thread bunching. If the machine jams, ensure the bobbin is correctly seated and the thread is not tangled. Refer to the manual for specific bobbin sizes and types recommended for your machine.
Adjusting Tension
Proper tension adjustment is essential for achieving even stitches with the Brother XL2600i. Incorrect tension can lead to puckering, loose stitches, or thread breakage. To adjust the top thread tension, locate the tension dial on the front of the machine. Turn the dial to the right to increase tension (for heavier fabrics) or to the left to decrease tension (for lighter fabrics). Always test the tension by sewing on a scrap piece of fabric before starting your project.
For the bobbin thread tension, gently pull the thread to check its resistance. If the bobbin thread is too tight, it may cause the top thread to pucker. If it’s too loose, the stitches may not form properly. To adjust the bobbin tension, use the small screw on the bobbin case. Turn the screw clockwise to tighten or counterclockwise to loosen. Be cautious not to over-tighten, as this can damage the machine or cause thread breakage.
After making adjustments, always retest the stitches by sewing a straight line on scrap fabric. If the tension is uneven, adjust the top or bobbin thread accordingly. For heavy or specialty fabrics, you may need to adjust the tension multiple times to find the perfect balance. Regular tension checks ensure consistent stitching and prevent project setbacks. If tension issues persist, consult the manual or contact Brother support for assistance.
Maintenance and Care
Regular maintenance ensures the Brother XL2600i operates smoothly. Clean the machine frequently to remove dust and debris, and oil moving parts to prevent friction. Check for worn or damaged components and replace them promptly. Store the machine in a dry, cool place to protect it from damage.
Cleaning the Machine
Regular cleaning is essential to maintain the performance and longevity of your Brother XL2600i sewing machine. Turn off and unplug the machine before cleaning to ensure safety. Use a soft, dry cloth to wipe down the exterior, removing any dust or debris. For the interior, gently brush away lint and thread remnants from the bobbin area, feed dogs, and stitch plate using a small, dry brush or a lint roller.
- Remove the needle and presser foot to access hard-to-reach areas.
- Use compressed air sparingly to blow out dust, but avoid spraying liquids or chemicals, as they may damage the machine.
- Pay special attention to the bobbin case and shuttle hook, as these areas tend to accumulate the most lint.
Cleaning after each use prevents dust and fabric particles from building up and causing mechanical issues. For stubborn stains or oil residue, dampen a cloth with distilled water, but avoid moisture near electrical components. Regular cleaning ensures smooth operation and prevents thread breakage or uneven stitching.
Oiling the Machine
Regular oiling is crucial for the smooth operation and longevity of your Brother XL2600i sewing machine. Turn off and unplug the machine before proceeding. Use only high-quality sewing machine oil, as specified in the manual, to prevent damage to internal components.
- Locate the oiling points, typically found near the bobbin case, hook race, and other moving metal parts. Refer to your manual for specific locations.
- Drip 1-2 drops of oil onto each designated area. Avoid over-oiling, as excess oil can attract dust and cause problems.
- Gently turn the handwheel to distribute the oil evenly across the internal mechanisms.
- Run the machine at a slow speed for a few minutes to allow the oil to circulate properly.
Oiling should be done every 1-2 months or after heavy use. If you notice squeaking, grinding, or uneven stitching, it may be a sign that the machine needs lubrication. Always use the correct type of oil to ensure compatibility and avoid damaging the machine’s internal components. Regular oiling will keep your Brother XL2600i running smoothly and extend its lifespan.
Replacing Parts

Replacing parts on your Brother XL2600i sewing machine is essential for maintaining its performance and addressing wear and tear. Always use genuine Brother replacement parts to ensure compatibility and optimal functionality. Common parts that may need replacement include the needle, bobbin case, feed dogs, and presser feet.
- Identifying Worn Parts: Check for signs of wear, such as blunt needles, damaged bobbin cases, or feed dogs that no longer grip fabric properly. These issues can lead to poor stitching or machine malfunction.
- Purchasing Replacement Parts: Buy parts directly from Brother authorized dealers or through the Brother official website to avoid counterfeit products. Ensure the part number matches your machine model.
- Replacing the Needle: Turn off the machine, raise the needle to its highest position, and gently pull it out. Insert the new needle with the flat side facing the correct direction, as indicated in the manual.
- Replacing the Bobbin Case: Remove the old bobbin case, clean the area, and install the new one, ensuring it clicks securely into place.
- Replacing Feed Dogs: This may require more technical expertise. Refer to the manual for step-by-step instructions or consult a professional if unsure;
Handle the machine with care during part replacement to avoid further damage. Regularly inspecting and replacing worn parts will keep your Brother XL2600i sewing machine in excellent working condition. Always follow the manual’s guidelines for specific replacement procedures.
Regular Checkups
Regular checkups are crucial to ensure the Brother XL2600i sewing machine operates efficiently and prolongs its lifespan. Schedule periodic inspections to identify and address potential issues before they escalate.
- Check the Needle: Examine the needle for signs of wear, such as dullness or bending. A damaged needle can cause uneven stitching or fabric damage.
- Inspect the Bobbin Area: Remove the bobbin and case to check for lint buildup or debris. Clean the area gently with a soft brush to ensure smooth operation.
- Verify Tension Settings: Ensure the thread tension is balanced. Uneven tension can lead to puckering or loose stitches, affecting the quality of your sewing projects.
- Check Stitch Length and Width: Confirm that the stitch length and width settings are appropriate for your fabric type. Incorrect settings may result in improper stitching.
- Monitor the Presser Foot: Ensure the presser foot is clean and free from debris. A clogged presser foot can hinder fabric movement and cause uneven stitching.
- Review Error Messages: If the machine displays error codes, refer to the manual or Brother support for troubleshooting guidance.
Performing these regular checkups helps maintain the machine’s performance and prevents unexpected issues. By staying proactive, you can ensure your Brother XL2600i continues to deliver high-quality results for all your sewing projects.
Troubleshooting Common Issues
The Brother XL2600i may encounter issues like thread breakage, uneven stitching, or fabric not feeding properly. Always refer to the manual for specific error codes and solutions. Regular maintenance, such as cleaning and checking tension, can prevent many common problems. Contact Brother support if issues persist.
Thread Breakage
Thread breakage is a common issue that can disrupt your sewing experience. It often occurs due to improper threading, incorrect tension settings, or using low-quality thread. To resolve this, first, rethread the machine following the manual’s guidelines, ensuring the thread is seated properly in the tension discs and take-up lever. Check that the bobbin is correctly wound and installed. If the issue persists, inspect the thread for knots or frays and replace it if necessary. Using high-quality, compatible thread is essential to prevent frequent breakage. Additionally, ensure the needle is the right size and type for your fabric, as a dull or incorrect needle can cause excessive tension on the thread. Regularly cleaning lint and debris from the machine can also help maintain smooth thread flow. If thread breakage continues, consult the manual or contact Brother support for further assistance. Regular maintenance and proper setup can significantly reduce this issue, ensuring a seamless sewing experience. Always refer to the troubleshooting section of the Brother XL2600i manual for detailed step-by-step solutions tailored to your machine. By addressing the root cause, you can minimize thread breakage and enjoy uninterrupted sewing sessions. Proper care and attention to threading techniques will enhance your overall sewing performance.
Fabric Not Feeding
Fabric not feeding properly is a common issue that can hinder your sewing progress. This problem often arises due to incorrect feed dog settings, improper pressure foot placement, or insufficient tension. To address this, first, ensure the feed dogs are in the “up” position and functioning correctly. If the feed dogs are not moving, check if they are manually lowered; raise them using the feed dog lever or button as per the manual. Next, verify that the pressure foot is fully lowered, as the machine will not feed fabric unless it is securely in place. If the fabric still does not move, inspect the stitch selection—some decorative stitches may not advance the fabric. Select a straight stitch or a basic utility stitch to test the feeding mechanism. Additionally, ensure the fabric is aligned correctly under the pressure foot and that there are no obstructions, such as tangled thread or debris, in the machine’s path. If the issue persists, check for wear or damage to the feed dogs or pressure foot and replace them if necessary. Regular cleaning and maintenance, as outlined in the manual, can prevent such problems. For further assistance, refer to the Brother XL2600i troubleshooting guide or contact customer support. Properly addressing fabric feeding issues ensures smooth and efficient sewing. Always ensure all components are in good working condition for optimal performance. By following these steps, you can resolve the issue and continue sewing without interruptions.
Error Messages
Error messages on the Brother XL2600i are designed to alert you to specific issues that need attention. These messages are displayed on the LCD screen and are accompanied by an audible beep. Understanding these messages is crucial for troubleshooting and ensuring uninterrupted sewing. Common error messages include E1, E2, E3, and E6, each corresponding to a specific problem. For instance, E1 typically indicates a power supply issue, while E2 suggests the bobbin is not installed correctly. E3 often relates to incorrect stitch length or width settings, and E6 may signal a jam or obstruction in the machine.
To resolve these issues, start by turning off the machine and unplugging it for a few seconds. This reset can often clear temporary glitches. Next, carefully inspect the area indicated by the error message. For example, if E2 appears, check that the bobbin is properly seated and the bobbin case is aligned correctly. For E6, look for tangled thread or fabric caught in the machine’s mechanisms. Always refer to the user manual for specific instructions, as some error messages may require more detailed troubleshooting steps.
Regular maintenance, such as cleaning the machine and oiling moving parts, can help prevent many of these errors. If the problem persists after following the recommended steps, contact Brother customer support for further assistance. Promptly addressing error messages ensures optimal performance and extends the lifespan of your Brother XL2600i.
Accessories for Enhanced Sewing
Enhance your sewing experience with the Brother XL2600i by utilizing the wide range of available accessories designed to expand its capabilities. These accessories are tailored to meet the needs of both beginners and experienced sewists, offering precision, convenience, and versatility for various sewing projects.
One of the most useful accessories is the set of presser feet, which includes the zigzag foot, zipper foot, blind hem foot, and buttonhole foot. Each foot is designed for specific tasks, such as sewing zippers, creating blind hems, or stitching buttonholes with ease. Additionally, the Brother XL2600i is compatible with a variety of specialized needles, including heavy-duty, denim, and quilting needles, ensuring optimal performance for different fabrics and sewing techniques.
The machine also supports optional sewing tools like a walking foot for handling thick fabrics or multiple layers and a twin needle for creating parallel straight stitches. These accessories are easy to install and can significantly enhance the machine’s functionality. For organization and portability, a sturdy carrying case is available to protect the machine and store accessories during travel.
Exploring the full range of Brother XL2600i accessories allows you to unlock the machine’s full potential, making it an even more valuable tool for your sewing projects. Whether you’re working on garments, home décor, or quilts, the right accessories can elevate your creativity and productivity.