
auto to manual transmission swap
Discover how to swap your auto to manual transmission with our step-by-step guide. Get DIY tips, expert advice, and more!
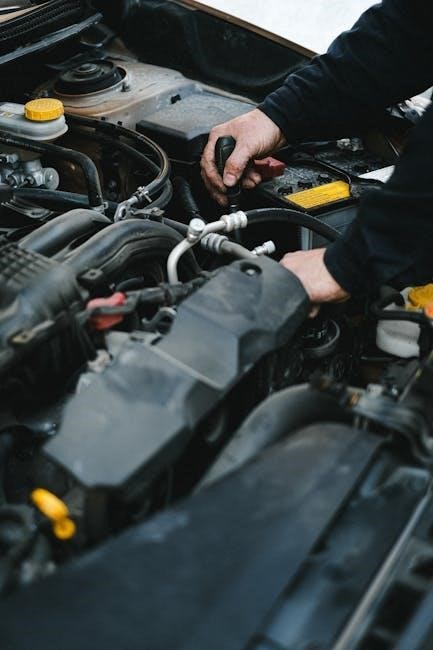
Swapping an automatic transmission to a manual is a complex process requiring precise planning and mechanical expertise. It involves replacing the entire transmission system‚ including key components like the bellhousing‚ flywheel‚ clutch‚ and pedal assembly. This project demands significant time‚ resources‚ and technical knowledge‚ making it challenging but rewarding for enthusiasts seeking enhanced control and driving experience.
Overview of the Process
Converting an automatic to a manual transmission involves a multi-step mechanical process. It requires replacing the automatic transmission with a manual unit‚ including a new bellhousing‚ flywheel‚ clutch‚ and pedal assembly. The process is complex‚ demanding careful planning and technical expertise. While straightforward for cars originally offered with manual options‚ it remains challenging for others‚ necessitating precise modifications and resource allocation to ensure success.
Why Consider a Transmission Swap?
A transmission swap from automatic to manual offers enhanced driver control and engagement‚ ideal for enthusiasts seeking a more immersive driving experience. It improves fuel efficiency and reduces reliance on complex automatic systems. Additionally‚ it can increase the car’s resale value among performance-oriented buyers‚ making it a popular choice for those passionate about driving dynamics and mechanical simplicity.
Key Considerations Before Starting the Swap
Assessing costs‚ mechanical complexity‚ and compatibility is crucial. Ensure the transmission and engine are compatible‚ and prepare for significant time and resource investment.
Cost Implications
The cost of an auto-to-manual transmission swap can be substantial‚ covering parts like the transmission‚ bellhousing‚ flywheel‚ clutch‚ and pedal assembly. Labor costs for professional installation add to the expense. Additional costs may include specialized tools‚ wiring modifications‚ and potential drivetrain upgrades‚ making it essential to budget carefully for both parts and labor.
Difficulty Level and Time Investment
An auto-to-manual transmission swap is a complex‚ time-consuming project requiring mechanical expertise. It involves precise disassembly‚ component replacement‚ and reassembly‚ often taking several weeks. Specialized tools and technical knowledge are essential‚ making it challenging for novices. Patience and dedication are crucial‚ as the process demands careful planning and execution to ensure reliability and performance post-swap.
Benefits of a Manual Transmission
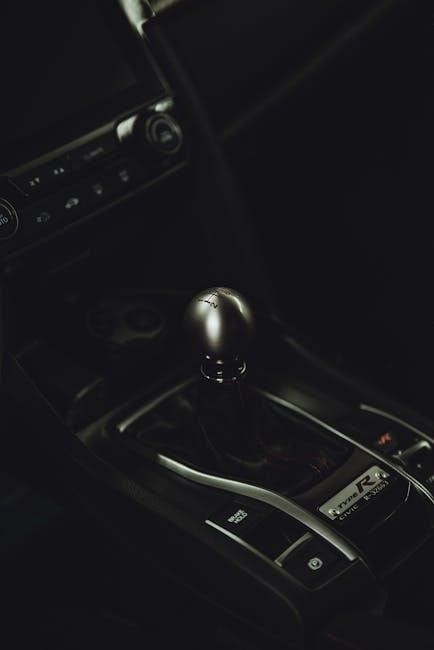
A manual transmission offers enhanced driver control‚ improved fuel efficiency‚ and lower maintenance costs. It provides a more engaging driving experience‚ with faster acceleration and better connectivity to the vehicle. Additionally‚ manuals are generally lighter and more durable than automatics‚ making them a preferred choice for performance enthusiasts and those seeking a more immersive driving connection.
Necessary Parts for the Swap
The essential components include a manual transmission‚ bellhousing‚ flywheel‚ clutch assembly‚ shaft assembly‚ pedal setup‚ linkage‚ and transmission mounts to ensure a smooth conversion process.
Transmission and Bellhousing
Selecting the right manual transmission and compatible bellhousing is crucial. The bellhousing must fit your engine‚ ensuring proper alignment. Choose a transmission with the correct gear ratio for optimal performance. A pilot bearing is essential for smooth operation. These components are fundamental to a successful swap‚ enabling proper power transfer and control.
Flywheel and Clutch Assembly
Replacing the automatic flywheel with a manual-compatible one is essential. A heavier flywheel may be needed for smoother clutch engagement. The clutch assembly‚ including the pressure plate and disc‚ must be installed to enable manual shifting. Proper alignment and secure bolting ensure reliable operation‚ preventing slippage and wear. This setup is critical for effective power transfer and driver control.
Shaft Assembly and Pedal Setup
The shaft assembly and pedal setup are crucial for manual transmission functionality. A new driveshaft and transmission input shaft must be installed‚ ensuring proper alignment with the engine. The pedal assembly‚ including master and slave cylinders‚ is added to enable clutch operation. Linkage adjustments are necessary for smooth gear engagement‚ ensuring precise control over the manual transmission system.
Linkage and Transmission Mounts
The linkage connects the shifter to the transmission‚ ensuring smooth gear engagement. Transmission mounts secure the unit to the chassis‚ preventing excessive movement. Both must be compatible with the manual transmission to maintain proper alignment and avoid vibrations. Incorrect installation can lead to misalignment or transmission damage‚ making precise setup crucial.

Step-by-Step Process of the Swap
Begin by removing the automatic transmission‚ then install the manual unit. Connect the clutch system‚ adjust linkage‚ and secure mounts. Ensure proper alignment and test functionality.
Removing the Automatic Transmission
Start by disconnecting the battery and draining fluids. Remove the driveshaft and transmission pan‚ then disconnect electrical connectors and hydraulic lines. Carefully lift the transmission using a jack or hoist‚ ensuring engine stability. Remove mounting bolts and slide the transmission out. This step requires precision to avoid damage to surrounding components and ensure a smooth swap.
Installing the Manual Transmission
Position the manual transmission under the vehicle‚ aligning it with the engine’s bellhousing. Secure it using mounting bolts‚ ensuring proper fitment. Reconnect the driveshaft‚ hydraulic lines‚ and electrical connectors. Tighten all bolts in the correct sequence to avoid misalignment. Double-check the transmission’s position and connections to ensure smooth operation and prevent future issues.
Setting Up the Clutch System
Install the clutch disc and pressure plate onto the flywheel‚ ensuring proper alignment with the pilot bearing. Connect the clutch slave cylinder to the transmission and bleed the hydraulic system to remove air. Adjust the clutch pedal linkage for optimal engagement and disengagement. Test the clutch operation to ensure smooth gear shifts and correct biting point.
Adjusting Transmission Mounts
Ensure the manual transmission is securely mounted using the correct brackets and hardware. Align the transmission with the engine and driveshaft‚ tightening mounts evenly; Check for proper clearance and alignment to prevent vibrations or damage. Adjust the transmission position as needed to achieve a stable and balanced installation‚ ensuring smooth power delivery and optimal drivetrain performance.
Tools and Equipment Needed
A transmission jack‚ wrenches‚ sockets‚ and specialized tools like a flywheel puller are essential. Ensure you have a jack‚ jack stands‚ and a clutch alignment tool for smooth installation.
Basic Tools Required
A socket set‚ wrenches‚ pliers‚ screwdrivers‚ and a transmission jack are essential. Jack stands‚ a drain pan‚ and a torque wrench are also needed. Ensure all tools are compatible with your vehicle’s specifications. A clutch alignment tool is necessary for proper clutch installation. Having these tools ready will streamline the swap process and prevent delays.
Specialized Tools for the Job
A pilot bearing installer‚ clutch alignment tool‚ and transmission jack are essential. The pilot bearing installer ensures proper bearing seating‚ while the clutch alignment tool guarantees accurate clutch installation. A transmission jack safely handles the heavy unit during removal and installation. These specialized tools are critical for a successful swap and prevent potential damage to components.
Electrical and Wiring Modifications
Modifying the wiring harness involves removing automatic transmission wiring and adding sensors like vehicle speed or countershaft speed sensors‚ a critical step requiring expertise.
Adapting the Wiring Harness
Adapting the wiring harness involves removing automatic transmission wiring and adding new connections for manual transmission components. This includes installing sensors like vehicle speed or countershaft speed sensors. Ensure all connections are secure and compatible with the new transmission system. Consulting a wiring diagram is essential to avoid electrical issues. Professional assistance may be necessary for complex setups.
Installing Sensors for Manual Transmission
Installing sensors for a manual transmission involves fitting a vehicle speed sensor or countershaft speed sensor. These sensors ensure proper communication between the transmission and the vehicle’s computer. Accurate installation is crucial for functions like speedometer calibration and traction control. Use compatible mounting hardware and wiring to avoid system malfunctions. Always refer to the manufacturer’s specifications for correct installation procedures.
Drivetrain and Engine Compatibility
Ensuring drivetrain and engine compatibility is crucial for a successful swap. The transmission must bolt to the engine‚ requiring precise alignment and compatible components like pilot bearings. Always verify specifications before installation to guarantee proper functionality and avoid mechanical issues.
Ensuring Compatibility
Ensuring compatibility is critical for a smooth transmission swap. The manual transmission must align with the engine’s bolt pattern and specifications. Pilot bearings‚ bellhousing‚ and drivetrain components must match the new setup. Compatibility checks prevent mechanical failures and ensure proper gear engagement. Always verify specifications before installation to maintain performance and reliability.
Potential Upgrades
A manual transmission swap often presents opportunities for upgrades. Upgrading the clutch system‚ flywheel‚ and drivetrain components can enhance performance. Installing a lightweight flywheel improves acceleration‚ while a high-performance clutch ensures reliability under stress. Additionally‚ upgrading the shifter and linkage can refine shifting precision and driver feedback‚ making the swap not just functional but also performance-oriented.
Pedal and Linkage Modifications
Modifying pedals and linkage is crucial for a smooth manual transmission swap. Replacing automatic pedals with manual ones and adjusting linkages ensures proper clutch and gear engagement‚ enhancing drivability and control.
Swapping Pedals
Swapping pedals is essential when converting from automatic to manual. Automatic pedals must be replaced with a manual setup‚ including a clutch pedal‚ brake pedal‚ and throttle. This involves installing a new pedal assembly‚ ensuring proper alignment and adjustment for smooth operation; The process may require modifying the pedal box and linkages to accommodate the manual system‚ ensuring precise control over the clutch and gears for optimal performance.
Adjusting Linkage
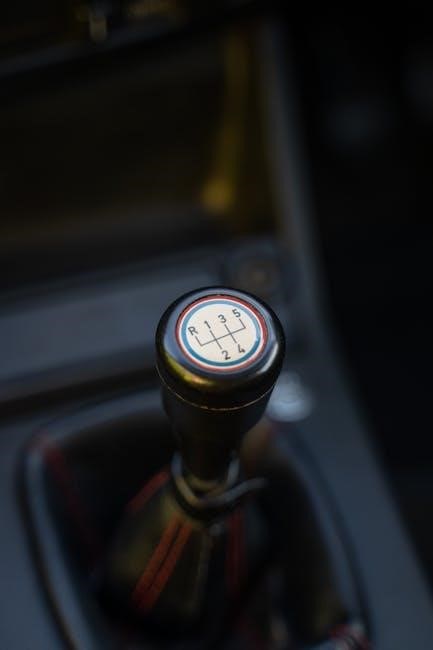
Adjusting the linkage is crucial for ensuring smooth operation of the manual transmission. The linkage connects the gear shifter to the transmission‚ requiring precise alignment and tension. Proper adjustment ensures accurate gear shifts and prevents wear on components. This step involves setting the correct length and tension of the shift linkage‚ often requiring specialized tools and careful calibration to achieve optimal performance and reliability.

Cooling System Considerations
Inspecting and upgrading the cooling system is essential during a transmission swap. Ensure the radiator‚ hoses‚ and coolant levels are sufficient to handle increased heat from manual operation.
Checking the Cooling System
Inspect the radiator‚ hoses‚ and coolant levels to ensure they can handle the increased heat generated by a manual transmission. Check for leaks or damage in the cooling system. Verify the transmission cooler is functioning properly and consider upgrading it if necessary. Proper cooling is vital to prevent overheating during the swap and ensure reliable performance afterward.
Upgrading Cooling Components
Consider upgrading to a high-performance radiator‚ durable hoses‚ and an advanced transmission cooler to handle increased heat from the manual transmission. These upgrades ensure optimal cooling‚ preventing overheating and extending the lifespan of your new transmission. Enhanced cooling components are especially crucial for vehicles subjected to frequent shifting or high-performance driving conditions.
Cost Implications and Budgeting
Transmission swap costs vary widely‚ depending on the vehicle‚ parts availability‚ and labor fees. Plan for significant expenses‚ including components and potential professional labor. Budgeting requires careful research and consideration of all associated fees to avoid financial surprises during the project.
Parts and Labor Costs
Parts and labor costs for a transmission swap can vary significantly. Key components like the manual transmission‚ bellhousing‚ flywheel‚ and clutch are essential. Labor costs depend on the mechanic’s expertise and location. Budgeting should account for these expenses‚ as they can range widely. Sourcing used or refurbished parts may help reduce costs‚ but ensure they are in good condition for reliability.
Budgeting Tips
Plan meticulously by researching parts costs and labor fees. Consider sourcing used or refurbished components to reduce expenses. Allocate funds for unexpected repairs or modifications. Compare prices from multiple suppliers to find the best deals. Prioritize essential parts over cosmetic upgrades initially. Create a contingency budget for unforeseen issues to avoid financial strain during the swap process.
Troubleshooting Common Issues
Common issues during swaps include leaking fluids‚ gear grinding‚ and clutch misalignment. Early detection and repair are crucial. Addressing these problems promptly ensures smooth operation and prevents further damage.
- Inspect connections and alignments regularly.
- Consult forums or manuals for tailored solutions.
Identifying Potential Problems
Common issues include incorrect transmission mounting‚ faulty clutch engagement‚ and wiring harness incompatibilities. Leakages from the bellhousing or hydraulic systems can also arise. Additionally‚ improper alignment of the driveshaft or pilot bearing may cause vibrations. Regular inspections and compatibility checks are essential to prevent these problems. Addressing them early ensures a smoother swap process and avoids costly repairs.
Solutions and Fixes
Resolving issues often involves adjusting transmission mounts and realigning the driveshaft. Replacing faulty components like the clutch or pilot bearing can address engagement problems. Ensuring proper wiring connections and harness compatibility is crucial. Regular maintenance‚ such as fluid checks and inspecting the bellhousing‚ helps prevent leaks. Consulting professional mechanics or detailed guides can provide tailored solutions for specific challenges encountered during the swap.
Maintenance and Care Post-Swap
Regular fluid changes‚ clutch inspections‚ and driveshaft checks are essential. Monitor transmission mounts and linkage for wear; Addressing issues promptly ensures smooth operation and longevity of the manual system.
Regular Maintenance Tips
Regularly inspect the clutch and pressure plate for wear. Check the transmission mounts and driveshaft for any signs of damage or misalignment. Ensure proper lubrication of all moving parts to prevent premature wear.
Monitor the cooling system to maintain optimal temperatures. Inspect the shift linkage and pedals for smooth operation. Address any unusual noises or vibrations promptly to avoid major repairs.
Scheduled Maintenance
- Inspect the clutch and pressure plate every 15‚000–30‚000 miles for wear and tear.
- Check transmission mounts and driveshaft alignment every 30‚000 miles to ensure proper fitment.
- Lubricate the transmission gears and linkage every 30‚000–60‚000 miles to maintain smooth operation.
- Service the cooling system every 50‚000–100‚000 miles to prevent overheating issues;