
flokati rug lacing needle instructions
Revive your beloved Flokati rug! Our simple, step-by-step lacing instructions will have it looking (and feeling!) fluffy again in no time. Don't toss it – restore it!
Flokati Rug Lacing: A Comprehensive Guide
Selecting the correct lacing needle is crucial; a blunt tip prevents fiber damage. Longer needles expedite the process, while curved options aid intricate patterns.
Flokati rugs, originating from Greece, are renowned for their incredibly soft, deep pile and luxurious feel; Traditionally crafted from 100% wool, these rugs offer exceptional warmth and comfort, making them a beloved addition to homes worldwide. The unique texture isn’t just for comfort; it’s integral to the lacing process, providing the perfect canvas for creating beautiful patterns.
However, a pristine Flokati isn’t the final form for many enthusiasts. Flokati rug lacing is a traditional technique used to further enhance these rugs, adding both visual appeal and structural integrity. This involves weaving yarn through the rug’s pile, creating intricate designs and securing the fibers.
To successfully embark on this craft, understanding the rug’s construction is key. The long, shaggy fibers require a specialized tool – the Flokati rug lacing needle. This isn’t your typical sewing needle! It’s designed specifically to navigate the dense pile without causing damage, and its selection impacts the ease and quality of your lacing work. Choosing the right needle is the first step towards a beautifully laced Flokati.
What is Flokati Lacing?
Flokati lacing is the art of weaving yarn through the deep pile of a Flokati rug to create decorative patterns and reinforce the rug’s structure. It’s a time-honored tradition that transforms a simple, shaggy rug into a stunning work of art. The process involves using a specialized needle – the Flokati rug lacing needle – to carefully thread yarn in various directions, forming geometric designs, borders, or even custom motifs.
Unlike traditional rug making, lacing doesn’t create the rug; it enhances it. It’s a surface-level technique that doesn’t require knotting or weaving a foundation. The lacing yarn becomes an integral part of the rug’s aesthetic, adding color, texture, and visual interest.
The lacing needle itself is crucial. It must possess a blunt, rounded tip to prevent cutting or damaging the delicate wool fibers. Its length and slight curvature influence the speed and intricacy of the designs achievable. Mastering the needle’s use is fundamental to successful Flokati lacing, unlocking a world of creative possibilities.
Materials & Tools Required
A Flokati lacing needle is paramount, featuring a blunt tip to safeguard the wool fibers. Choose a length comfortable for handling, aiding precision.
Flokati Rug – Choosing the Right One
Selecting the appropriate Flokati rug is the first step, and its construction directly impacts the lacing process. A genuine, 100% wool Flokati, with a dense, long-pile weave, is ideal. Avoid rugs with synthetic fibers, as they won’t hold the lacing yarn as securely or offer the same aesthetic appeal.
Consider the rug’s size and existing pattern (if any). Larger rugs naturally require more lacing yarn and time. Rugs with pre-existing patterns might influence your lacing design – you can complement or contrast them. Examine the backing; a sturdy, woven backing is essential for supporting the lacing.
Before purchasing, gently test the pile’s density. Run your hand across the surface; it should feel plush and resilient. A looser pile might require more intricate lacing to maintain structure. Also, assess the rug’s cleanliness. A clean rug provides a better surface for lacing and prevents dirt from embedding in the yarn. Finally, remember that the quality of the Flokati directly influences the final result, so invest in a well-made rug for a lasting, beautiful piece.
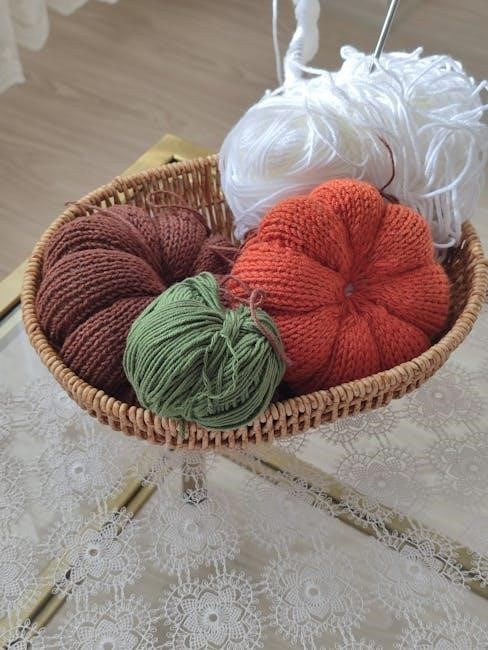
Lacing Yarn – Types and Colors
The choice of lacing yarn significantly impacts the rug’s final appearance and durability. Traditionally, 100% wool yarn is preferred, mirroring the rug’s material for consistent texture and resilience. However, acrylic or cotton blends can offer cost-effective alternatives, though they may lack the same longevity. Consider yarn weight; a medium-weight yarn typically works best, providing sufficient coverage without overwhelming the Flokati’s pile.
Color selection is where creativity shines! Monochromatic schemes using varying shades of white or cream create a subtle, elegant look. Contrasting colors – like deep blues or rich reds against a white Flokati – deliver a bold statement. Experiment with gradients and ombré effects for a modern touch.
Before committing, test yarn colors on a small, inconspicuous area of the rug. Ensure the color complements the Flokati’s existing hue and doesn’t clash. Remember to purchase enough yarn to complete the entire design, accounting for potential knots and adjustments. Quality yarn ensures a beautiful, long-lasting finish;
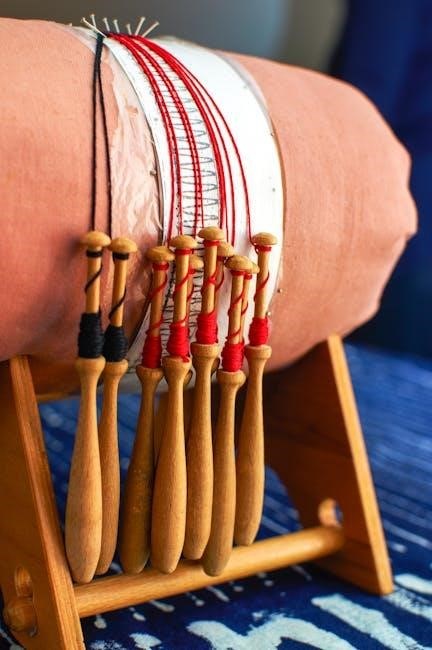
The Essential Flokati Rug Lacing Needle
A specialized lacing needle is paramount for successful Flokati rug lacing. Unlike standard sewing needles, these possess a uniquely blunt, rounded tip – crucially preventing damage to the delicate Flokati fibers. Sharp points can snag and pull, distorting the rug’s luxurious texture. Look for needles crafted from stainless steel for durability and resistance to bending.
Needle size is also vital. A larger eye accommodates thicker lacing yarn, simplifying threading. Sizes ranging from 18 to 22 generally work well, depending on your yarn weight. Longer needles (approximately 3-4 inches) are highly recommended, as they allow you to pass through multiple rows of the rug pile with ease, speeding up the lacing process.
Consider a curved lacing needle for intricate patterns or tight spaces. These facilitate maneuvering around existing laced areas. Always inspect the needle before use, ensuring the eye is smooth and free from burrs that could snag the yarn. Proper needle selection safeguards your rug and enhances your lacing experience.
Other Helpful Tools (Scissors, Comb, etc.)
While the lacing needle is central, several supporting tools elevate the process. Sharp scissors are essential for cleanly trimming yarn ends, preventing unraveling and maintaining a neat appearance. A metal comb with widely spaced teeth proves invaluable for fluffing the rug pile before and after lacing, restoring its characteristic softness and revealing the lacing grid.
Yarn needles (darning needles), distinct from lacing needles, are useful for weaving in yarn ends securely. Masking tape can temporarily secure starting points or mark pattern guidelines. A ruler or measuring tape aids in maintaining consistent spacing for patterned lacing. Consider a needle threader if you find threading the lacing needle challenging.
A small weight, like a beanbag or smooth stone, placed on the yarn spool prevents it from rolling away during lacing. Good lighting is crucial for clear visibility of the lacing grid and yarn. Having these supplementary tools readily available streamlines the lacing process and contributes to a professional finish.
Preparing Your Rug for Lacing
Before lacing, ensure your needle is correctly threaded. A properly threaded needle, with sufficient yarn, minimizes interruptions during the lacing process.
Initial Rug Fluffing & Cleaning
Selecting the appropriate lacing needle is paramount for a successful outcome. Opt for a long, blunt-tipped needle specifically designed for rug hooking or yarn work; these minimize fiber damage within the delicate Flokati weave. Avoid sharp needles, as they can easily cut or snag the wool fibers, compromising the rug’s integrity and aesthetic appeal.
Consider the needle’s eye size. It must be large enough to comfortably accommodate your chosen lacing yarn without requiring excessive force to thread. A larger eye also reduces yarn fraying. Stainless steel needles are preferred for their durability and resistance to bending during prolonged use.
Before beginning, test the needle in an inconspicuous area to ensure it glides smoothly through the rug’s fibers. If resistance is encountered, reassess your needle choice or gently comb the area to loosen the fibers. A well-chosen and properly used needle is an investment in the longevity and beauty of your laced Flokati rug.
Identifying the Lacing Grid
The lacing needle’s handle grip is vital for comfort and control. Look for needles with ergonomic designs or consider adding a rubber grip for extended lacing sessions. A secure grip minimizes hand fatigue and enhances precision, particularly when working on intricate patterns.
Needle length impacts efficiency. Longer needles (around 4-6 inches) allow you to pass the yarn through multiple rows at once, speeding up the process. Shorter needles are useful for detailed work or tight spaces. Curved needles are invaluable for navigating corners and creating specific design elements.
Regularly inspect your needle for burrs or damage. A damaged needle can snag the yarn and ruin your work. Replace any needle that shows signs of wear. Proper needle maintenance ensures consistent, high-quality lacing. Remember, a smooth, undamaged needle is your ally in creating a beautiful Flokati masterpiece.
Securing the Starting Point
Choosing the right needle gauge is essential. A larger gauge (thicker needle) is suitable for thicker lacing yarn, while a smaller gauge works best with finer yarns. Experiment to find the optimal size that allows the yarn to flow smoothly without being too tight or too loose.
Needle material affects performance. Stainless steel needles are durable, resist bending, and offer a smooth surface for yarn passage. Plastic needles are more affordable but may be less durable. Consider your budget and lacing frequency when selecting a material.
Thread the lacing yarn onto the needle, leaving a tail of approximately 6-8 inches. This tail will be used to secure the starting knot. Ensure the yarn is securely threaded to prevent it from slipping off during the lacing process. A well-threaded needle is the foundation of a successful lacing project, guaranteeing a neat and durable finish.

The Basic Lacing Technique
Hold the needle comfortably, like a pencil. Gently pierce the rug’s base, guiding the yarn through. Maintain a consistent rhythm for even lacing throughout.
Step 1: The First Pass – Creating the Foundation
Begin by threading your chosen lacing yarn onto the flokati rug lacing needle. Leave a generous tail – approximately 6-8 inches – extending from the starting point; this will be secured later. The initial pass establishes the structural base for your lacing pattern, so precision is key.
Insert the needle, with the yarn trailing, through the first designated hole in the rug’s grid. Gently pull the yarn through, leaving the tail on the top side. Avoid forcing the needle; a slight wiggling motion can help navigate the dense fibers.
Continue threading the needle through each subsequent hole in a straight line, maintaining consistent tension. The yarn should lie flat against the rug’s surface, not pulled too tightly or left excessively loose. This first row acts as an anchor, dictating the overall neatness of the finished design. Ensure each stitch is secure before proceeding to the next. A smooth, even first pass is paramount for a professional-looking result.
Step 2: Weaving the Yarn – Over and Under
Having completed the first pass, it’s time to introduce the weaving action that defines flokati lacing. Turn the rug 180 degrees, preparing for the return journey. Thread the lacing needle with the yarn, ensuring a comfortable working length remains.
Now, begin weaving the yarn over the yarn from the first pass in the first hole, and under in the second, continuing this ‘over-under’ pattern across the entire row. Maintain consistent tension – too tight, and the rug will pucker; too loose, and the lacing will appear sloppy.
As you weave, gently guide the needle through the existing loops, ensuring the yarn sits neatly alongside its predecessor. This interlocking technique creates a secure and visually appealing pattern. Pay close attention to the rhythm – over, under, over, under – to establish a uniform texture. A slight tug after each stitch helps to settle the yarn.
Step 3: Maintaining Tension – Avoiding Looseness
Consistent tension is paramount for a beautifully laced flokati rug. Avoid pulling the yarn excessively tight, as this can distort the rug’s shape and potentially damage the delicate fibers. Instead, aim for a firm, yet gentle, pull with each pass of the lacing needle.
To gauge appropriate tension, imagine you’re securing a stitch in knitting or crochet – it should be snug, but not constricting. Periodically step back and assess the overall appearance of the lacing. Are there any areas that appear noticeably looser or tighter than others? Adjust your technique accordingly.
If you find the tension slipping, try anchoring the yarn with your fingers as you weave. A slight downward pressure on the needle can also help maintain control. Remember, a little practice goes a long way in mastering this crucial skill. Consistent, moderate tension will result in a durable and aesthetically pleasing finish;

Advanced Lacing Patterns
For complex designs, a needle with a larger eye simplifies yarn changes. Experiment with different needle gauges to achieve varied textural effects. Precision is key!
Diagonal Lacing – A Classic Look
When executing diagonal lacing, needle selection becomes particularly important for maintaining consistent angles and preventing snagging. A slightly shorter, straight lacing needle often provides superior control compared to longer or curved varieties. This is because shorter needles allow for more precise maneuvering within the dense Flokati fibers, especially when navigating the diagonal path.

Consider a needle with a polished finish; this reduces friction and allows it to glide smoothly through the rug’s pile. Regularly check the needle’s tip for any burrs or imperfections that could potentially pull or damage the delicate Flokati wool. A blunt, yet refined, tip is ideal.
Furthermore, ensure the eye of the needle is large enough to comfortably accommodate your chosen lacing yarn without causing undue stress or fraying. A needle that’s too small can make threading difficult and increase the risk of yarn breakage during the lacing process. Maintaining a consistent tension is also easier with a well-suited needle, resulting in a beautifully defined diagonal pattern.
Checkerboard Lacing – For a Bold Design
For the precise, geometric demands of checkerboard lacing, a needle with exceptional rigidity is paramount. Flexibility can lead to inconsistent stitch placement and a distorted pattern. A stainless steel lacing needle, known for its strength and lack of bend, is highly recommended. The needle’s length should be moderate – long enough to span several squares of the checkerboard, but not so long as to become unwieldy.
Pay close attention to the needle’s point; it must be sufficiently blunt to avoid splitting the Flokati fibers, yet sharp enough to penetrate the pile cleanly. A slightly tapered point offers the best balance. Regularly inspect the needle for any signs of wear or damage, as even a minor imperfection can disrupt the uniformity of the checkerboard design.
A needle with a clearly defined eye will simplify threading, especially when switching between different yarn colors for the contrasting squares. Consistent tension is vital, and a sturdy needle facilitates maintaining that control throughout the process, ensuring a crisp and visually striking checkerboard effect.
Custom Pattern Creation – Unleashing Creativity
When venturing into custom Flokati lacing patterns, needle versatility becomes key. A set containing needles of varying lengths and curvatures is invaluable. Consider a needle with a side-entry eye – these are exceptionally useful for complex color changes and intricate designs, minimizing yarn tangling. For particularly dense or detailed patterns, a shorter, more precise needle offers superior control.
Experiment with different needle materials; while stainless steel remains a reliable choice, some artisans prefer the smoother glide of titanium needles for delicate work. The needle’s diameter should be appropriate for your chosen yarn weight – a thicker yarn requires a larger eye. Regularly assess the needle’s performance as you progress, switching to a different size or shape if needed.
Don’t underestimate the value of a needle minder! Losing track of your needle mid-pattern can be frustrating. A comfortable grip is also essential, especially during extended lacing sessions. Ultimately, the ideal needle is the one that feels most natural and allows you to translate your creative vision onto the Flokati rug.
Troubleshooting Common Issues
A bent needle can snag fibers; discard it. Dull needles cause resistance, potentially damaging the rug. Regularly inspect your needle for imperfections during lacing.
Dealing with Yarn Breaks
When your lacing yarn breaks, don’t panic! The key is a secure and nearly invisible rejoin. First, carefully thread the broken end back through the eye of your flokati rug lacing needle. This is often easier with a needle possessing a larger eye.
Next, locate the point where the yarn snapped and gently weave the re-threaded end back into the existing lacing, following the established pattern for at least two to three passes. Avoid creating bulky knots that will disrupt the rug’s texture.
Ensure the rejoined yarn is pulled taut, mirroring the tension of the surrounding lacing. A slightly curved lacing needle can be particularly helpful for maneuvering the yarn within the dense pile. If the break occurred close to the starting or ending point, consider trimming the frayed ends very closely to minimize visibility. Regularly check your yarn’s strength during lacing to prevent frequent breaks, and consider using a higher-quality yarn if breakage is a persistent issue.
Fixing Uneven Lacing
Uneven lacing is common, especially for beginners! The flokati rug lacing needle plays a role – ensure it’s not catching on fibers, creating inconsistent loops. If you notice areas that are looser or tighter than others, don’t attempt to pull or stretch the existing lacing;
Instead, carefully use your needle to gently adjust the tension of individual passes. Work slowly and methodically, adding or releasing small amounts of yarn as needed. A longer needle can provide more leverage for these adjustments.
For significant discrepancies, you might need to carefully unravel a few passes and re-lace them, paying close attention to maintaining consistent tension. Regularly step back to assess your progress and identify areas needing correction. A needle with a smooth shaft will glide through the fibers more easily, aiding in even lacing. Remember, patience is key to achieving a beautifully laced Flokati rug!
Addressing Rug Shrinkage
While lacing itself doesn’t directly cause shrinkage, the rug’s fibers can react to moisture during cleaning. A flokati rug lacing needle isn’t involved in preventing this, but understanding the process is vital. If shrinkage occurs, gentle manipulation can sometimes restore the original size.
Avoid aggressive stretching, as this can damage the fibers. Instead, lightly mist the affected areas with water and gently pull the rug back into shape. A longer needle can be useful for carefully re-lacing any areas distorted by the shrinkage, providing support as you reshape the rug.
Consistent lacing tension throughout the rug helps maintain its structural integrity, minimizing the impact of potential shrinkage. Regular, gentle fluffing also aids in preserving the rug’s shape. Remember, prevention is best – always follow cleaning instructions carefully to minimize moisture exposure and potential shrinkage.
Finishing Touches & Rug Care
A flokati rug lacing needle aids in tucking yarn ends securely. Inspect lacing regularly for looseness, re-threading with the needle as needed for lasting beauty.
Securing the Final Knot
Once your lacing is complete, securing the final knot is paramount to prevent unraveling and ensure the longevity of your beautiful Flokati rug. The technique utilizes the lacing needle to carefully thread the yarn tail back through several loops of the existing lacing, creating a robust anchor point.
Begin by threading the yarn tail onto your lacing needle. Then, gently insert the needle under several adjacent laced strands, pulling the yarn through to create a loop. Repeat this process 2-3 times, varying the strands you pass through to distribute the tension and create a more secure hold. Avoid pulling too tightly, as this can distort the lacing pattern.
After threading, carefully trim the yarn tail, leaving approximately 1-2 inches extending from the rug’s base. Use the needle’s tip to gently tuck this remaining yarn end within the rug’s fibers, concealing it from view. This prevents tripping hazards and maintains a clean, finished appearance. A properly secured knot, achieved with the aid of your lacing needle, guarantees years of enjoyment from your handcrafted Flokati.
Fluffing and Grooming After Lacing
After completing the lacing process, your Flokati rug may appear somewhat compressed. Revitalizing its signature plushness requires gentle fluffing and grooming – a process where the lacing needle surprisingly plays a subtle role! While not directly used for fluffing, the needle’s prior work creates a more stable structure for this step.
Begin by gently shaking the rug to loosen the fibers. Then, using your hands, carefully work through the pile, lifting and separating the wool. A wide-toothed comb can be incredibly helpful here, but avoid harsh brushing which can damage the delicate fibers. Focus on areas that appear flattened or matted, working in the direction of the wool’s natural flow.
For particularly stubborn areas, the tip of your lacing needle (used cautiously!) can delicately tease apart tangled fibers. Never force the needle; gentle persuasion is key. This restores the rug’s airy texture and highlights the intricate lacing pattern. Regular fluffing, following the lacing, maintains the rug’s luxurious feel and appearance for years to come.
Cleaning and Maintaining Your Laced Flokati Rug
Preserving the beauty of your laced Flokati requires a delicate approach to cleaning and maintenance. The lacing itself, achieved with careful needlework, adds structural integrity but doesn’t alter the fundamental cleaning needs of the wool. Avoid harsh chemicals and abrasive cleaners, as these can damage the fibers and disrupt the lacing.
Regular vacuuming – ideally with a suction-only attachment – is essential to remove dust and debris. Never use a beater bar, as it can pull at the wool and loosen the lacing. For spills, blot immediately with a clean, absorbent cloth. A mild soap solution (specifically designed for wool) can be used sparingly, followed by thorough rinsing with cool water.
Professional cleaning is recommended annually or bi-annually. When storing, ensure the rug is clean and dry, and avoid direct sunlight. The precision of the initial lacing, facilitated by the correct needle, contributes to the rug’s longevity, but consistent, gentle care is paramount.